Blog
In my blogs I will focus on how to use crochet to create stuff that will make life easier or prettier... Read up as you might find some of them useful as well. Some designs will be for free and some designs will have a price... It all depends on the effort it went into making/researching/designing it.
Please check the list of the blog entries as the titles of each entry will more or less hint what it is about...
Sign up for a NEWSLETTER as among regular updates, there will be seasonal creations that you will want to check out so you can have the best ideas made into best stuff by you! Subscription available on Home.
2022-06-20
Elodie’s Bunting- FREE CROCHET PATTERN

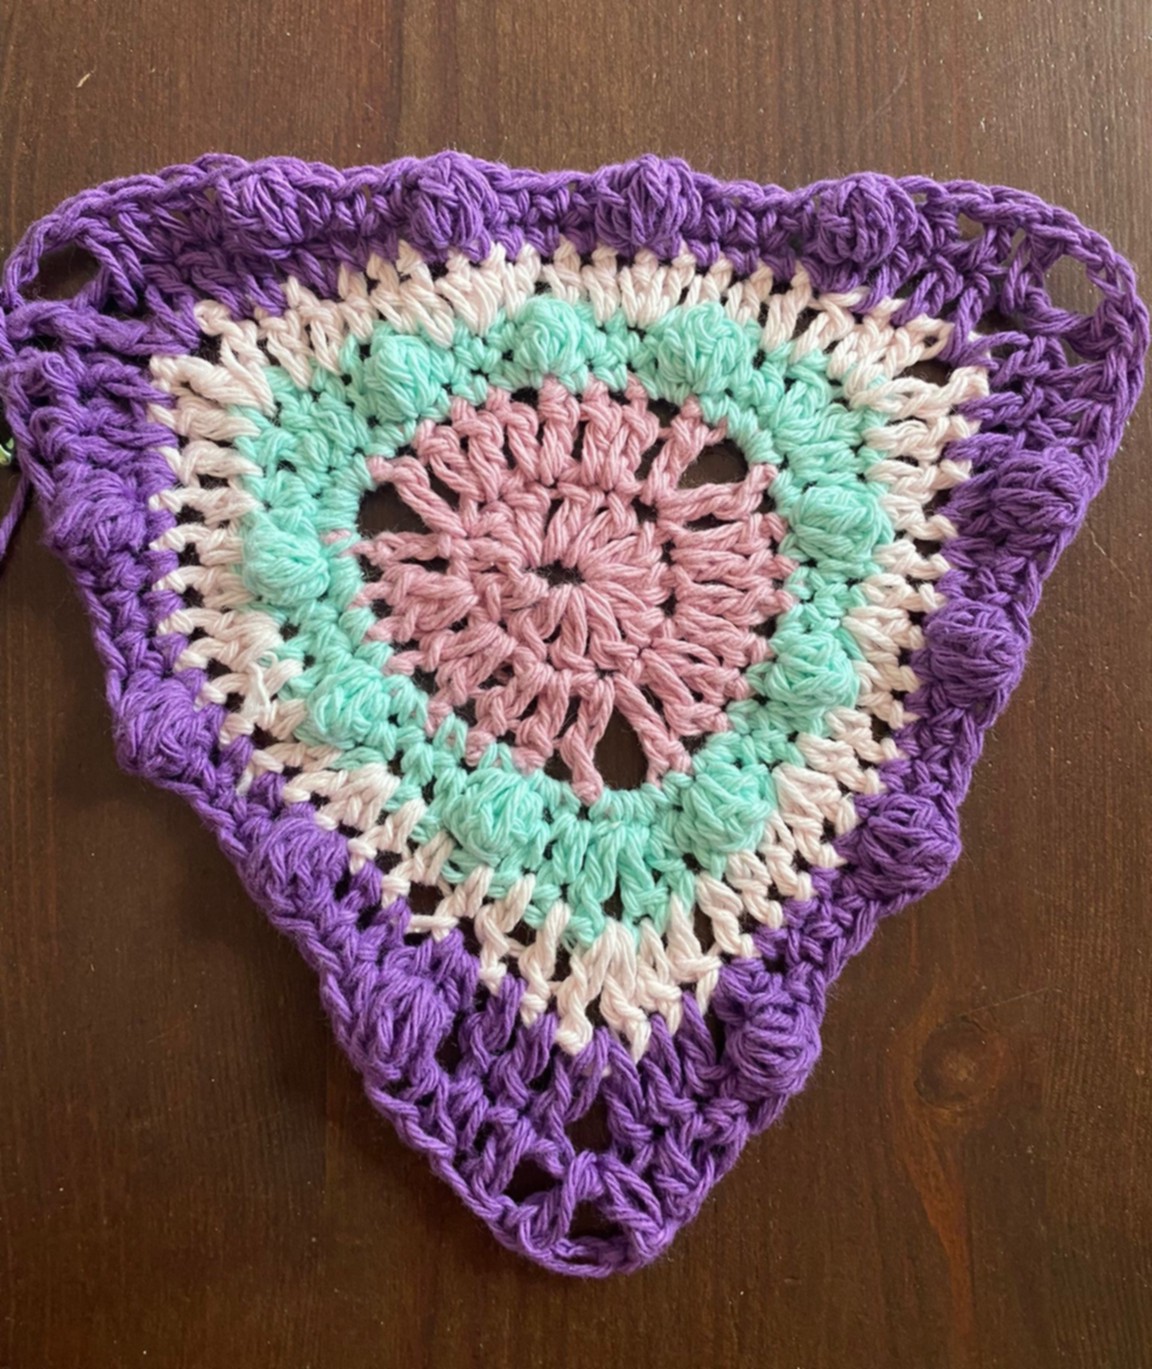
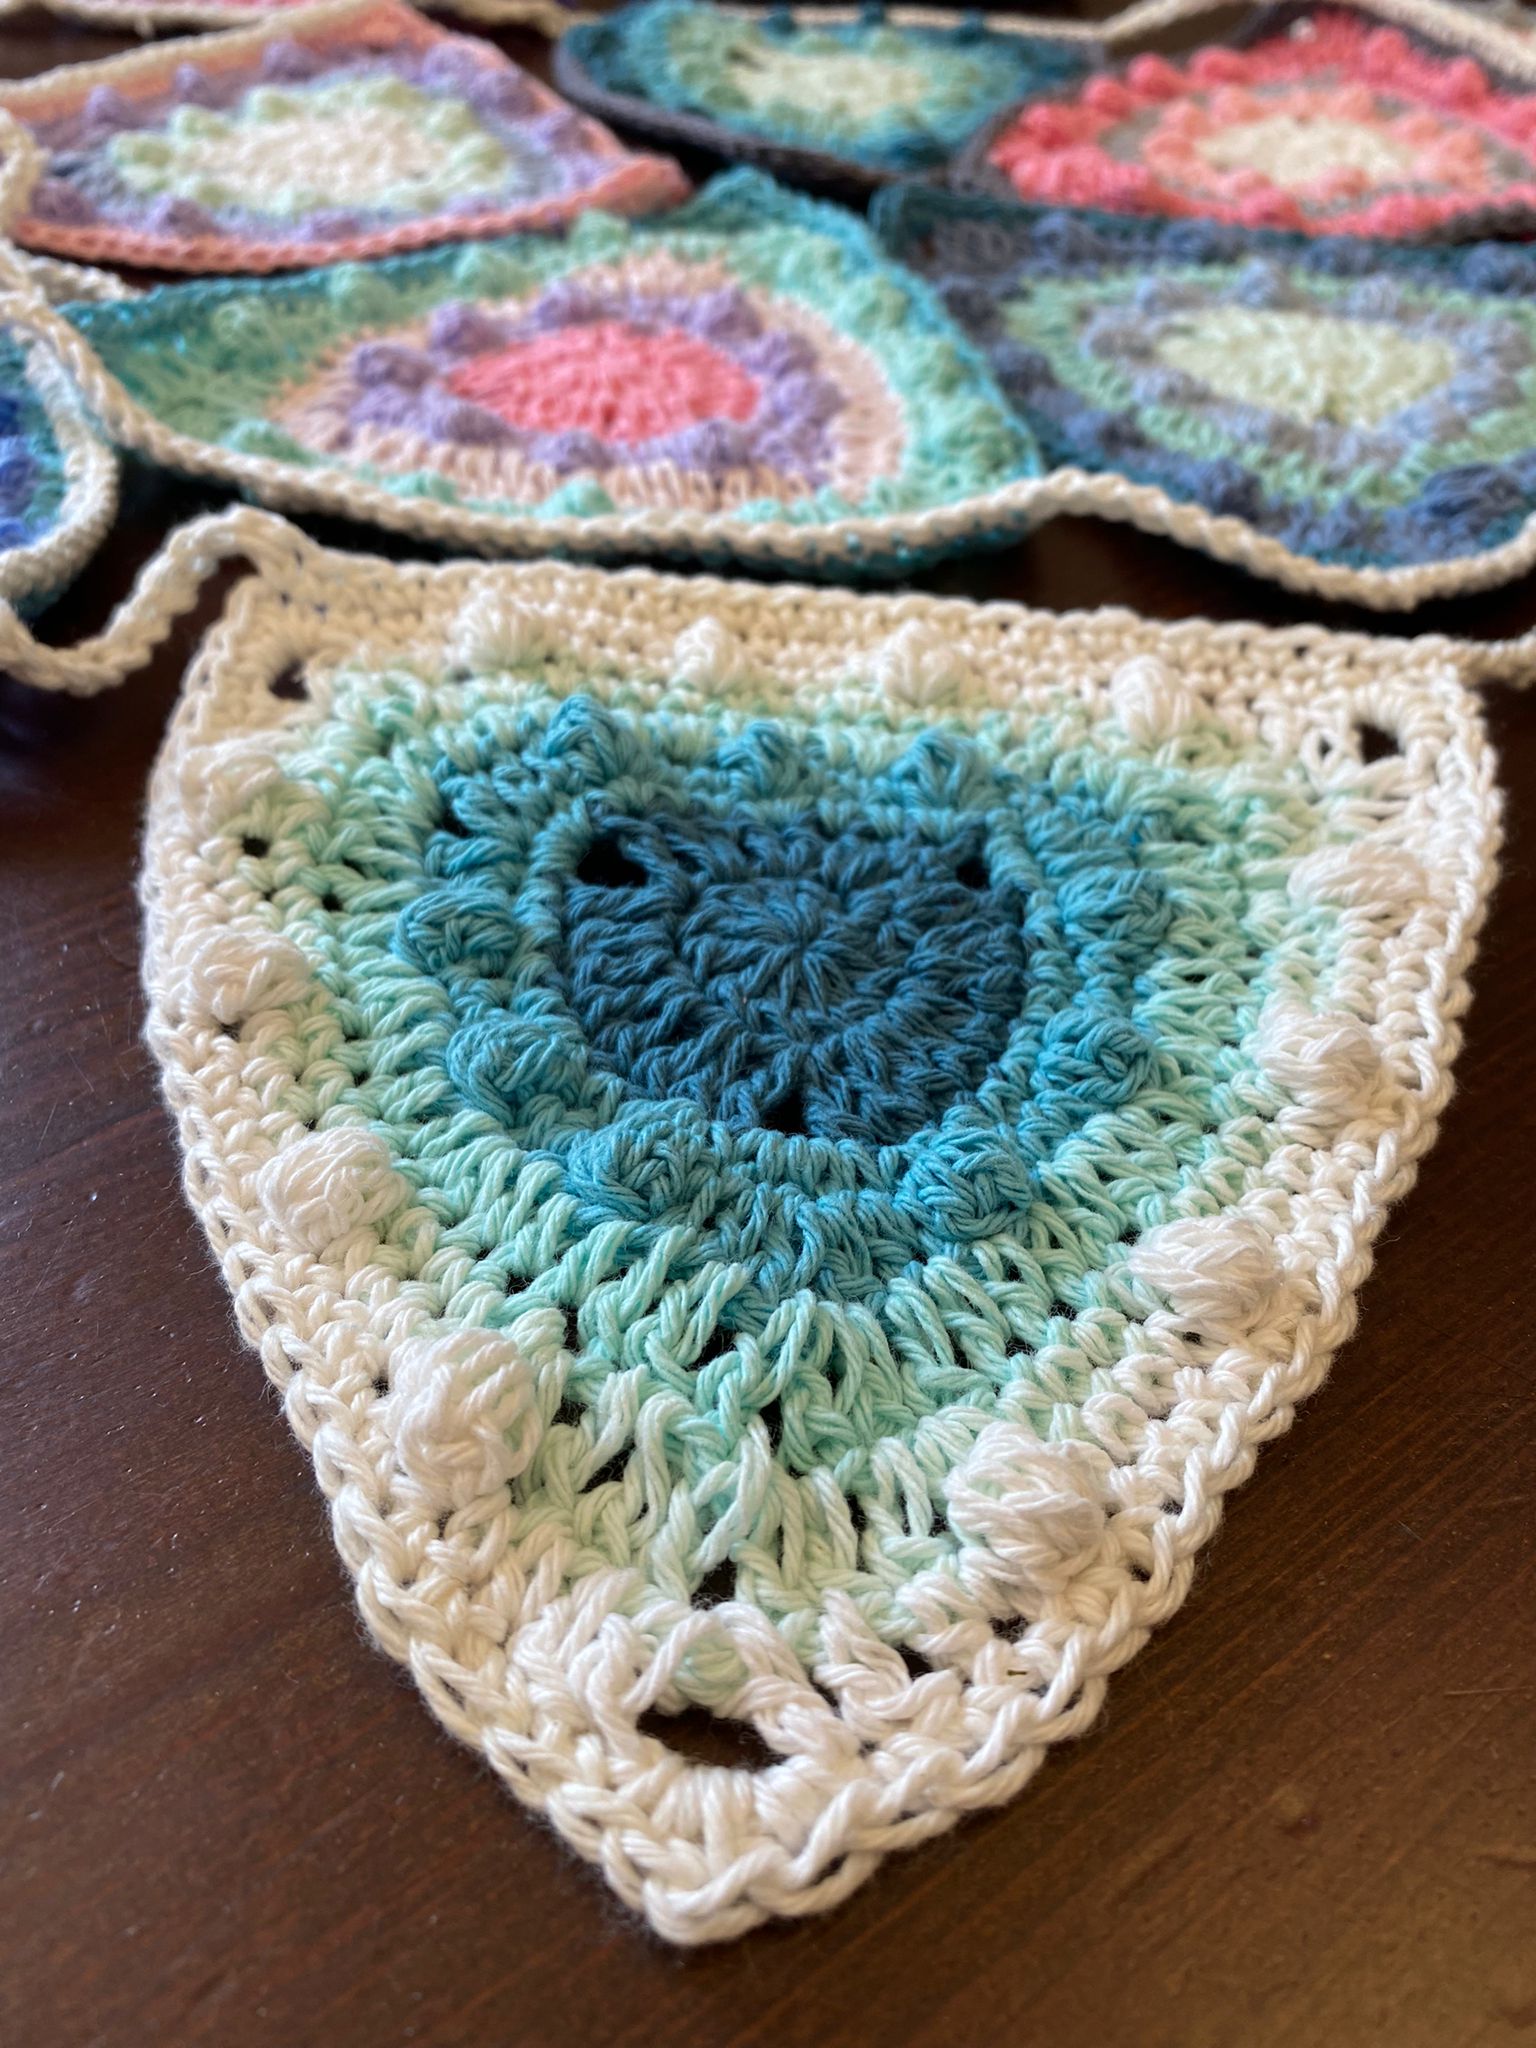
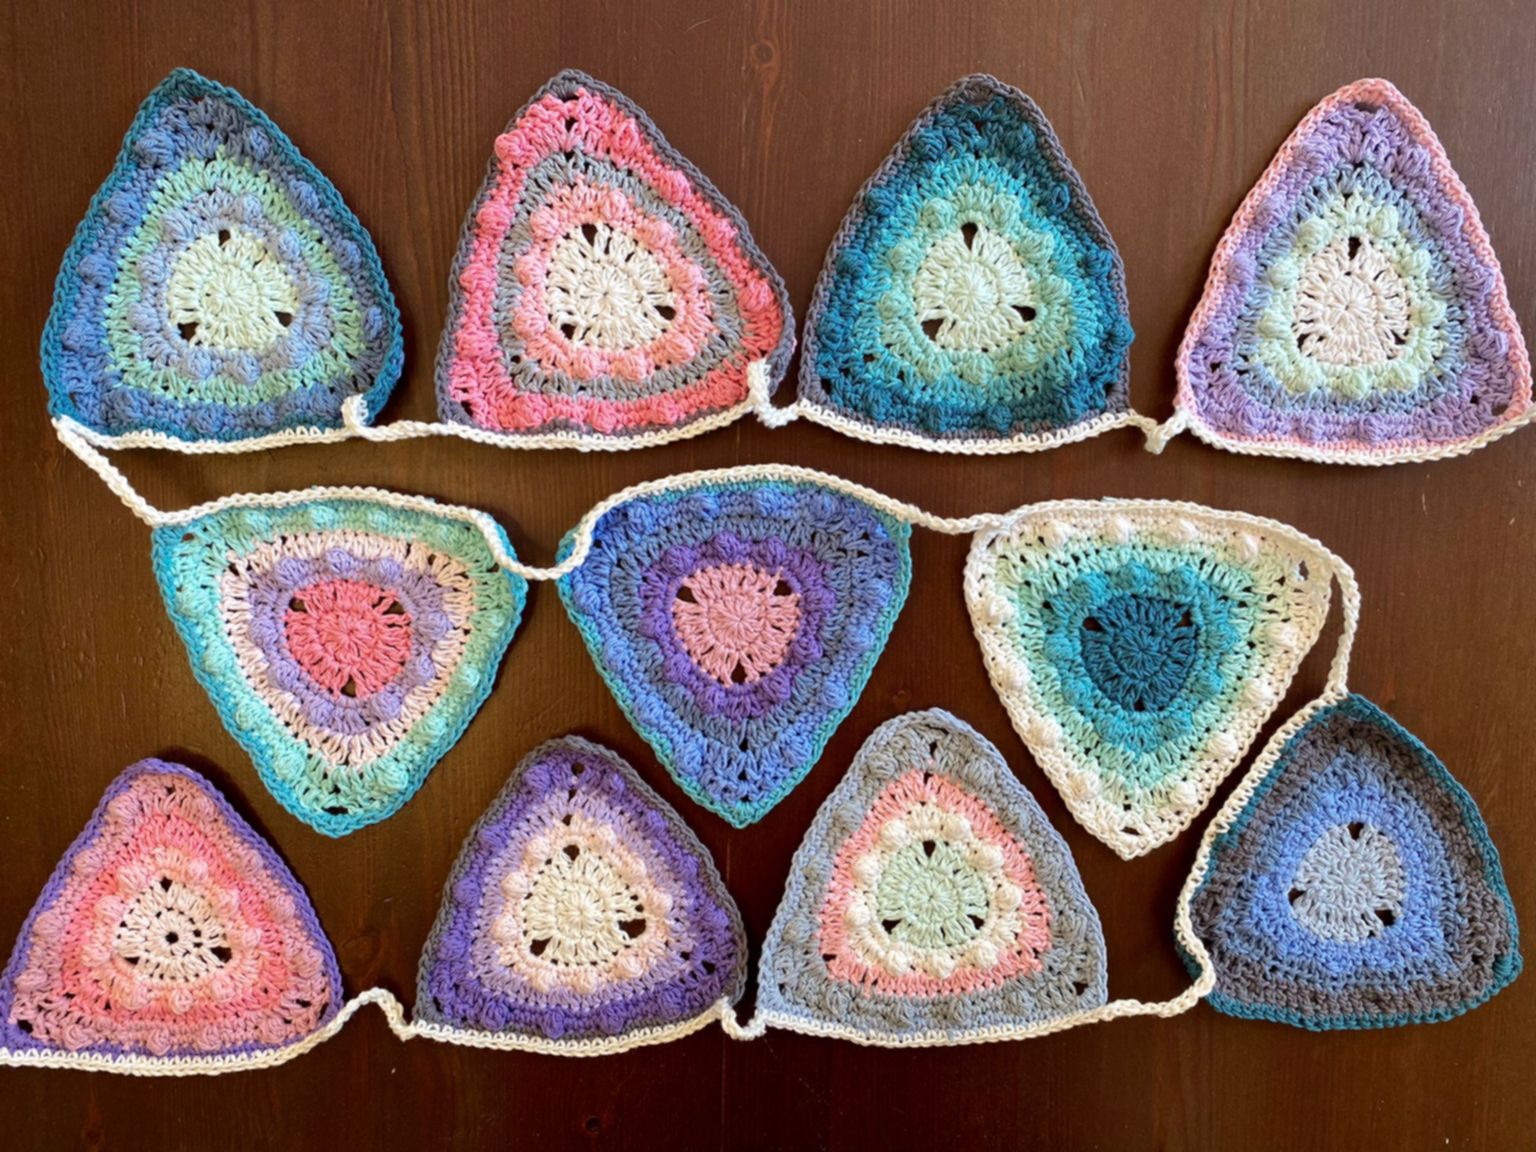
Elodie’s Bunting is a product of an idea I had when my daughter was turning 1. So I decided to make a bunting for decoration and while chatting with my husband I came up with an idea. I would make a bunting every year for her birthday and when she turns 18 and is about to go to Uni I would connect all the triangles from the bunting into a blanket. Some years I will design my own and some I will just make from another designer’s pattern. The first year I used someone else’s pattern and this year I have designed one of my own. In the end it is best to block the triangles before connecting into bunting.
Materials
Yarn- any you want, I used the #3 for the hooks 2,5mm-3mm ( I used the hook 3mm), and the size that came out was 6.5 inches as length of one triangle side. Scissors and needle for weaving in ends are needed as well.
Important
Pattern is written in US terms.
Pattern is done in rounds.
Sl st will not be counted as a stitch as well as ch’s within the pattern.
Bobble stitch holds an extra ch to fasten it, look at abbreviations.
Abbreviations
In US terms
MC-magic circle
Ch- chain
Sc- single crochet
Hdc- half double crochet
Dc- double crochet
Sl st- slip stitch
Sp- space
Sk st-skip stitch
Sc2inc- increase with 2 sc’s in same st
Hdc2inc- increase with 2 hdc’s in same st
Bobble- bobble stitch, usually bobble stitch doesn’t include a ch to fasten it of but here it will be, this extra ch will not be mentioned in the pattern
Instructions
Round 1
Dc12
Round 2
Ch3 (counted as first dc stitch), 3x 2dc, dc+ch2+dc, 3x 2dc, dc+ch2+dc, 3x 2dc, dc+ch2 in same stitch as the first one, slst into the first stitch to join=24 st
Change color if you want
Round 3
Sc backwards into the first sp to the right (that will be counted as first sc in first dc), sc2inc in the next st (2nd dc from round 2), sc2, sc2inc, sc2, sc2inc in the last dc before sp, sc3 in sp, sc, sc2inc, sc2, sc2inc, sc2, sc2inc, sc3 in sp, sc, sc2inc, sc2, sc2inc, sc2, sc2inc, sc3 in sp, slst to join= 42st
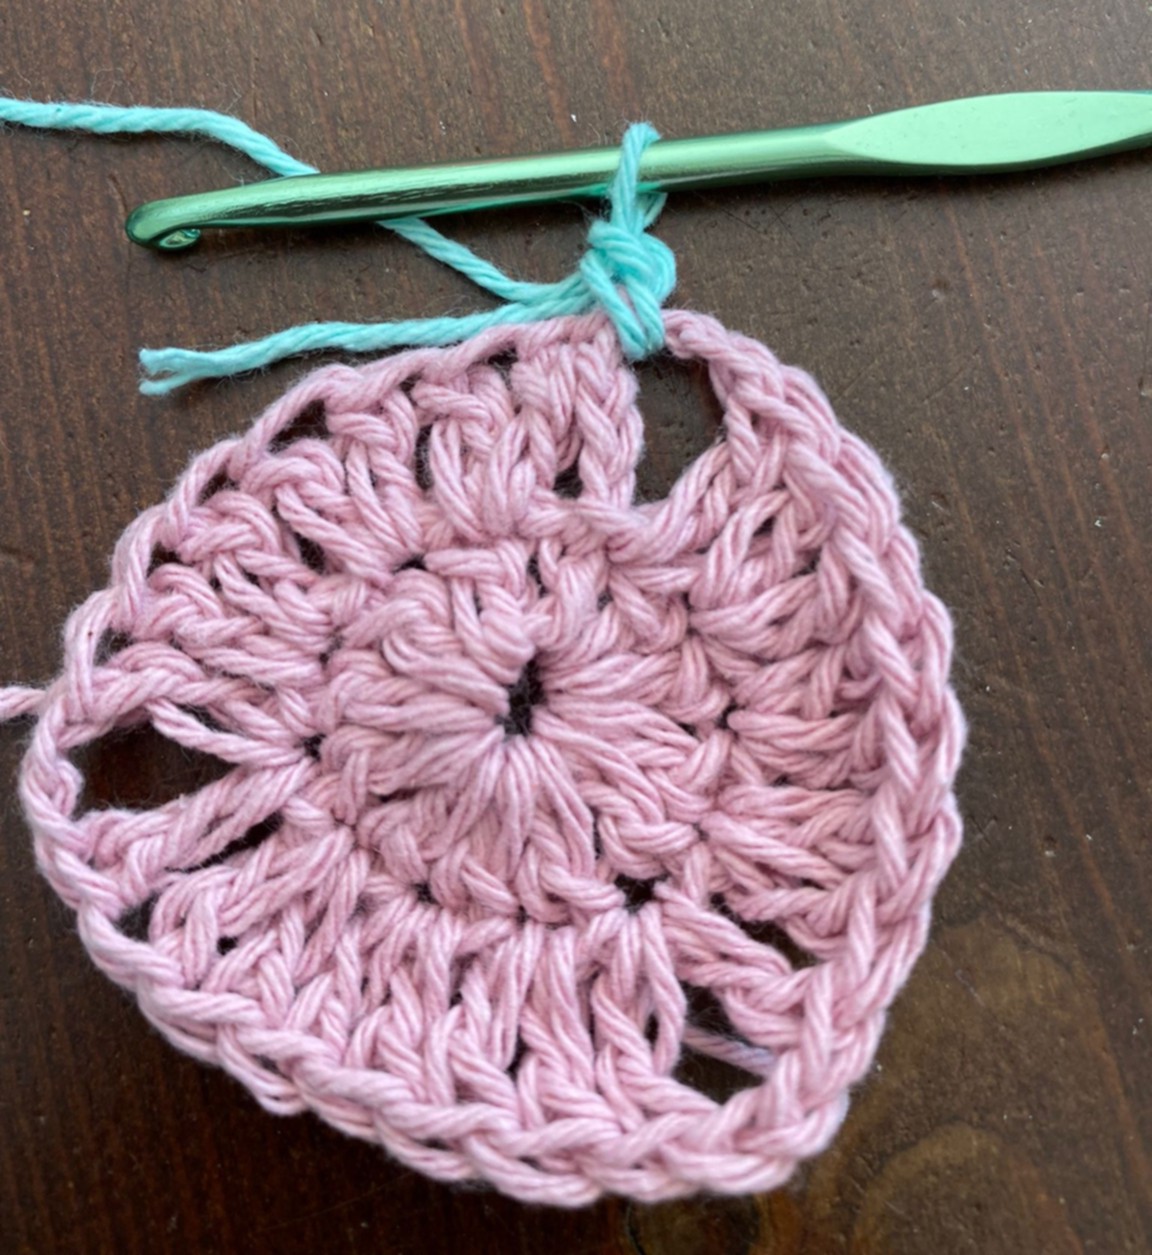
Round 4
You should be at the first sc after sp from round 3, ch1 (this is only instance where this will be counted as sc), make a bobble (in the first sc of sc2inc from round 3), sc3, bobble, sc3, bobble, sc, hdc, dc+ch2+dc in middle sc from sc3 in sp from round 3, hdc, sc, bobble, sc3, bobble, sc3, bobble, sc, hdc, dc+ch2+dc in sp, hdc, sc, bobble, sc3, bobble, sc3, bobble, sc, hdc, dc+ch2+dc in sp, hdc, slst to join= 45st
Change color if you want
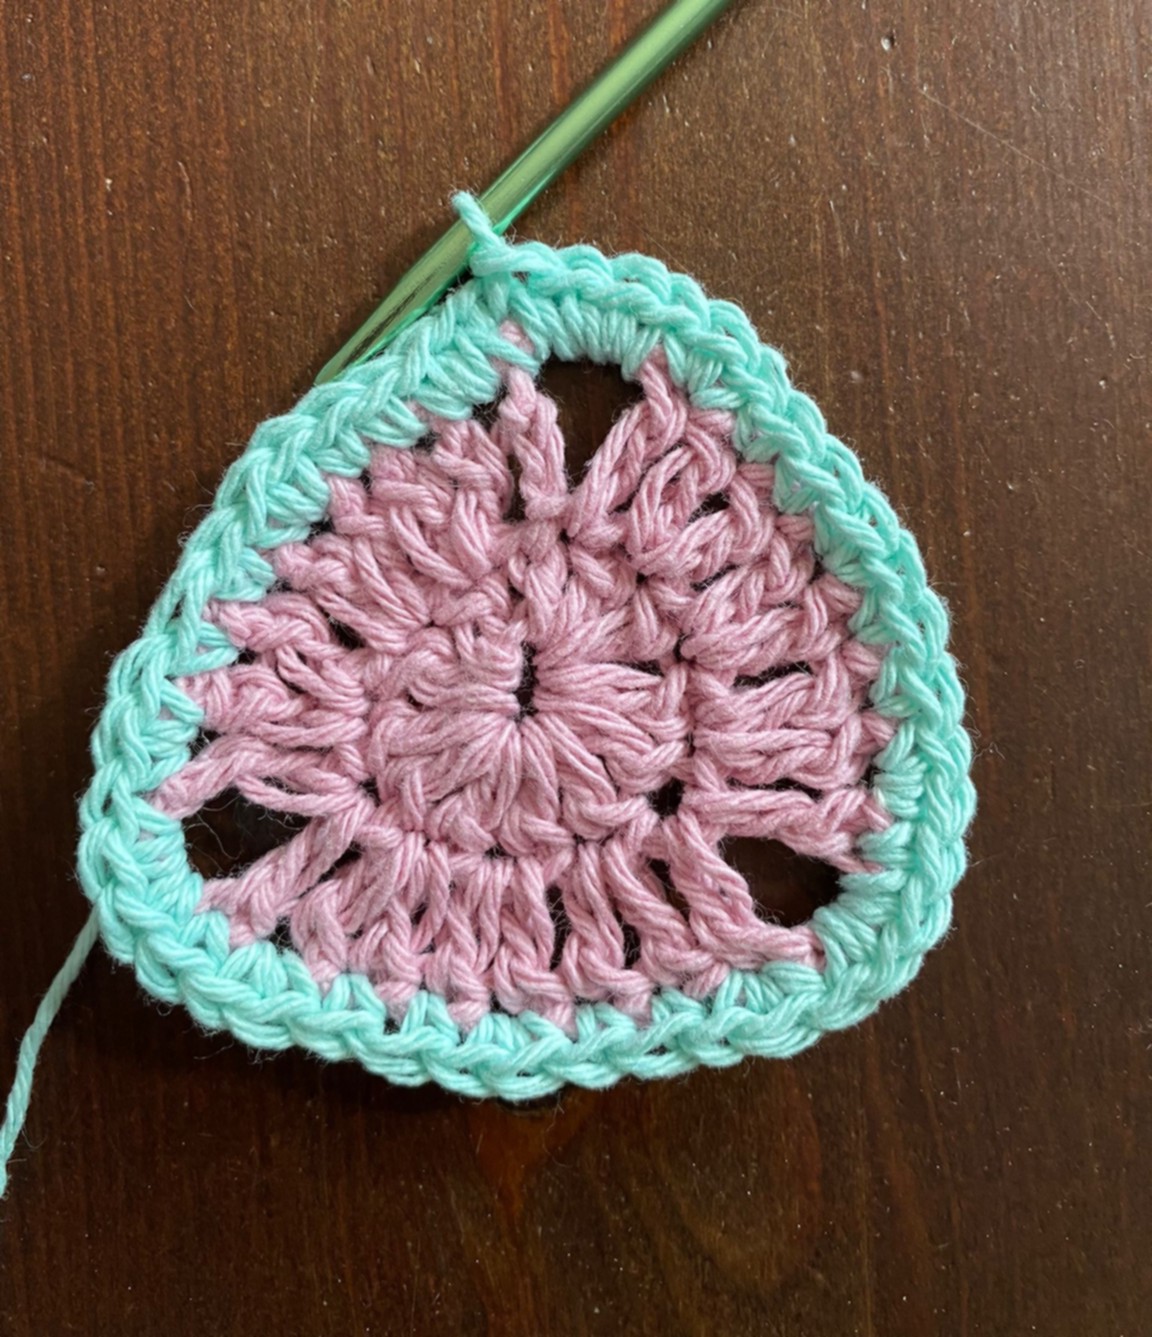
Round 5
Attach new color into the last sp from round 4, dc (or ch3), dc2, hdc3, hdc2inc (these will be located in the middle sc between bobbles from round 4), hdc3, hdc2inc, hdc3, dc2, dc+ch2+dc, dc2, hdc3, hdc2inc, hdc3, hdc2inc, hdc3, dc2, dc+ch2+dc, dc2, hdc3, hdc2inc, hdc3, hdc2inc, hdc3, dc2, dc+ch2, slst to join= 57st
Change color if you want
Round 6
Attach new color into the last sp of round 5 and do dc (or ch3) in sp, sk st, dc2, hdc2inc, sc12 (after these there should still be 3 st before sp), hdc2inc, dc2, dc+ch2+dc,sk st, dc2, hdc2inc, sc12, hdc2inc, dc2, dc+ch2+dc, sk st, dc2, sc12, hdc2inc, dc2, dc+ch2, slst to join= 66st
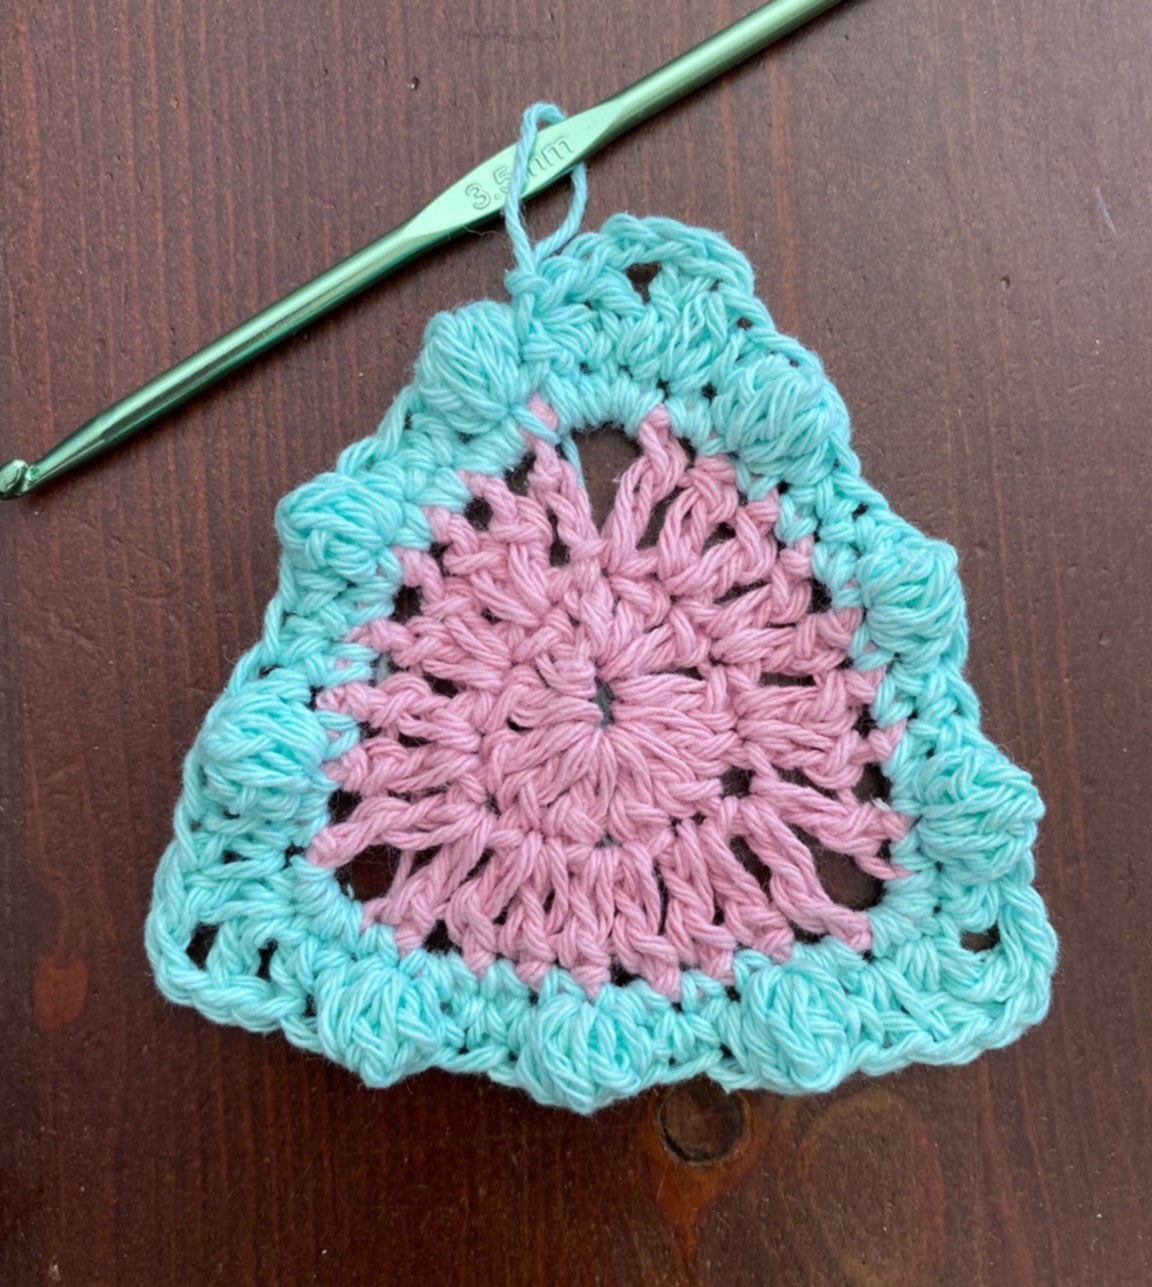
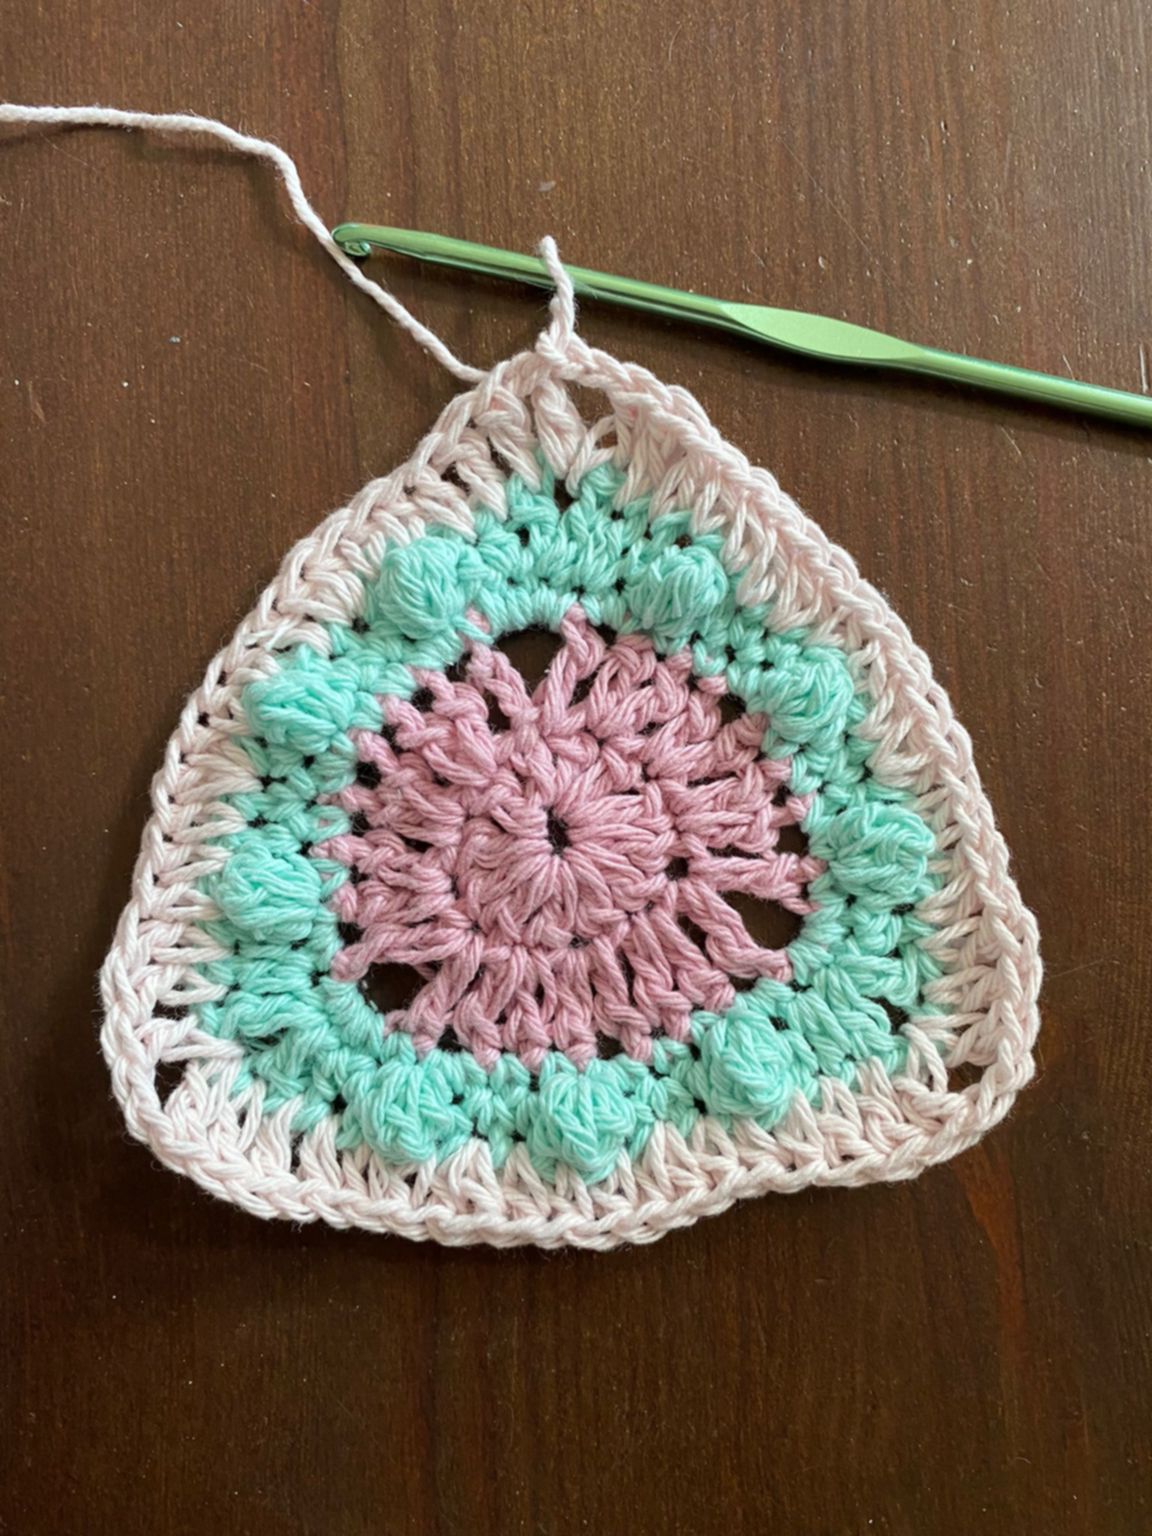
Round 7
Sc backwards in the sp +ch3 (counts as dc in sp), sk st, dc, hdc, sc, bobble in 2nd hdc of hdc2inc from round 6, sc4, bobble, sc4, bobble, sc3, bobble, sc, hdc, dc, dc+ch2+dc, sk st, dc, hdc, sc, bobble, sc4, bobble, sc4, bobble, sc3, bobble, sc, hdc, dc, dc+ch2+dc, sk st, dc, hdc, sc, bobble, sc4, bobble, sc4, bobble, sc4, bobble, sc, hdc, dc, dc+ch2, slst to join= 69st
Change color if you want
Round 8
Ch1, sc in all stitches until sp, sc+hdc+hdc+sc in sp, sc in all stitches until sp, sc+hdc+hdc+sc in sp, sc in all stitches until sp, sc+hdc+hdc+sc in sp, sc until the first sc in this round, slst to join= 81st
Connecting the triangles into a bunting
As for connecting the buntings there are two ways I do it. Starting with about 20-30 (depending on yarn) ch and then sc over one side of the triangle, more ch between (again your choice, I would at least do 5- I usually do 10). There is one other sturdier way (not really needed unless you like it). This one is shown in my reels on IG and on my Pinterest Idea Pins. So please look it up there.
Now that you are done with making the item, I’d love to see your creation if you’re willing to share! You can find me on Pinterest (Made By Nensi), Facebook (Made By Nensi), Instagram (made_by_nensi) or my blog MadeByNensi. If you tag me in your post, I will show off your work by featuring it in my stories and/or posts). You can also subscribe to my mailing list on my blog and receive discounts for any new pattern and will be able to read up on how it was created and as well read up on all new things I am working on in that moment…
Liking my pattern, my store or any of my media will of course be very much appreciated and will help me very much!
COPYRIGHT: This pattern may be printed for the personal use of the purchaser only.
You MAY NOT in any form reproduce or distribute this pattern in part or in whole through any venue, electronic, mechanical or otherwise without the written authorization of the publisher. Also, any use of my photos is also not permitted.
You are granted permission to sell the finished product for profit. Please refer back to me as the patterns author with a link to my shop!
Enjoy the pattern!
Admin - 23:49:13 | Add a comment
Add comment
Fill out the form below to add your own comments